Just a Note… March 23, 2022
Posted by Danielle in Crafts.Tags: InkyStamper, Memento Tuxedo Black
4 comments
Happy Wednesday, everyone! I’m so happy to be back and sharing a new project with you today. This time around, I’m using InkyStamper‘s Ant, and I just love this set!


For this project, I started with one of the note paper pads from the Dollar Store. It can be separated into three different smaller pads, but I chose to keep it together because I like how sturdy it is that way. I cut the blue gingham cardstock out as the background because it reminded me of the stereotypical picnic blanket. I stamped everything in Tuxedo Black Memento ink and colored Ant in using Arteza alcohol ink markers. I stamped out the sentiment on some scrap white cardstock and glued it on near the top of the pad, and (my favorite part of this set) stamped the row of ants marching along the bottom of the set. The marching ants just make me smile. And no, in real life, I do not want to see any ants walking around anywhere!! However, adorable, stamped ants are too cute to resist!
I hope you enjoyed seeing this project. Please stop by the InkyStamper Store if you have a chance to check out all her amazing goodies!
Let’s Shellebrate! March 16, 2022
Posted by Danielle in Crafts.Tags: InkyStamper, Memento Tuxedo Black, Spectrum Noir
3 comments
Hello, Everyone, and happy Wednesday! Today I’m bringing you a shaker card using InkyStamper‘s Crab stamp and die kit. I think he is super adorable, and I couldn’t wait to get him when he first came out. You’ll have to let me know if you’re as excited about him as I was.

For this card, I started out with a white A2 card base and I covered it with some kraft cardstock for the sand, and some light blue cardstock for the sky. I used Spectrum Noir Triblends in Dark Red alcohol markers to add some texture to the sand, and to color in Crab. I absolutely love the Fishy Wishes shaker bits, and I had to add them to my beachy low country boil. To accent my pot, I used the little seashells, fussy cut from some cardstock from my stash.
I hope you enjoyed my little beach scene! Please check out InkyStamper if you decide you need this adorable set!
Buggy Over You March 9, 2022
Posted by Danielle in Crafts.Tags: Arteza, InkyStamper, Memento Tuxedo Black
6 comments
Happy Wednesday! The week just flew by!! I’m super excited to bring you another InkyStamper project.

For this card, I had to look up cicada images because I had no clue what they looked like. They are quite… unique! The red eyes and yellowy orange wings really got me! I had to use Cicada on a card. For this project, I used Memento Tuxedo Black ink to stamp so I could color using alcohol markers. For the coloring this time, I used a combination of Arteza alcohol markers. I love that Cicada comes with a die to cut him out, but I loved the other elements included with him, the hearts and leaves, that I fussy cut them out – something that is definitely not my first choice to do… but these elements really set off the image nicely. I just had to use them!
Please visit InkyStamper’s store to find all sorts of buggy goodness (along with so many other awesome critters to make your day Bugtacular!) Hope you enjoyed today’s project, and I’ll see you again next week!
Have an Ice Day March 2, 2022
Posted by Danielle in Crafts.Tags: InkyStamper, Memento Tuxedo Black, Spectrum Noir
3 comments

Hello, everyone! It’s been a very long time since I’ve posted anything, but when InkyStamper asked me to be a guest designer for them for March, I couldn’t pass that opportunity up! I am so excited to share what I’ve made with everyone. I figured I’d start with a “cold” project since it’s March 2, and around here we’re still apt to get snow in April!
For this project, I decided to make a little gift bag, suitable for any occasion – or “Just Because!” I used a bag die to cut out the bag, and I measured the sides. Then, I cut a piece of white cardstock to 2 3/4″x3 3/4″ so it would mat nicely onto the side of the bag. Using the adorable Penguin stamp and die set, I stamped out the penguin in the bottom left corner, and I put the icicles in the upper right corner. Since I wanted to color the images with alcohol markers, I stamped using Memento Tuxedo Black ink and colored the image in with Spectrum Noir Triblend markers (Ice Grey Blend and Orange Blend). Once finished, I thought it needed a little something else, so I added the snowflakes in the background using Baby Blue Harmony ink. The sentiment is also from the Penguin stamp and die set, stamped and cut out, then matted on the same blue-grey cardstock that I used to create the bag.
I hope you enjoyed seeing this adorable little treat bag! I’ll see you next week with another project.
Peacock Die Cut Layers April 7, 2018
Posted by Danielle in Crafts.Tags: Mica/Metallic, Paper Temptress, Scrapbooking Made Simple
3 comments
This is a gorgeous example of what you can do with the Mica/Metallic line of cardstock. It is heavyweight cardstock that cuts like a dream, even with the most intricate designs.
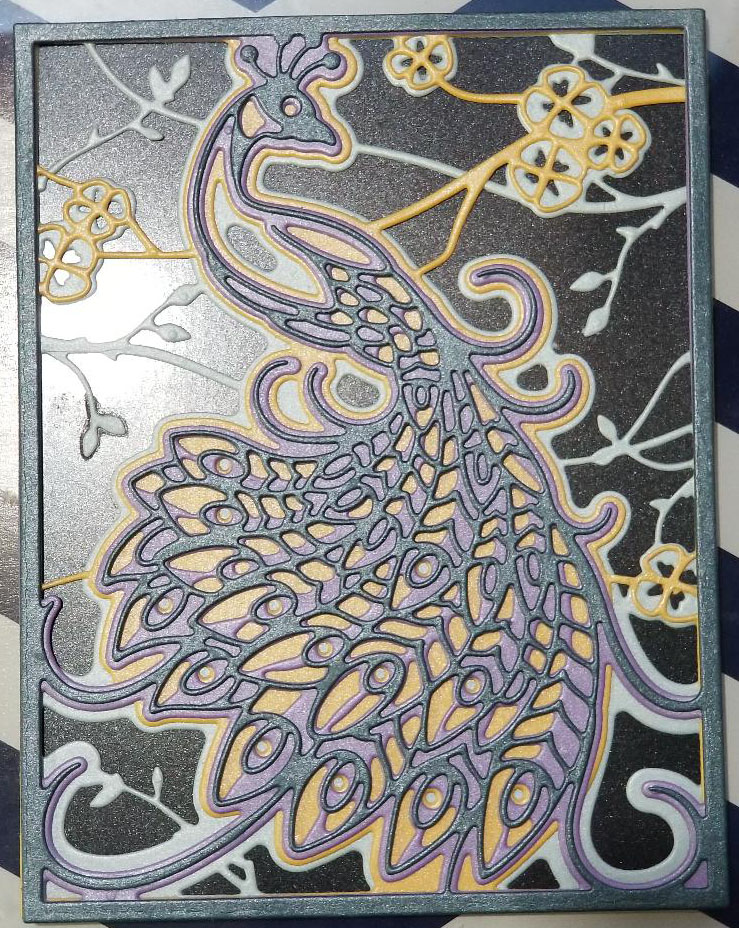
This card is backed on the gorgeous Black Pearl Glossy cardstock. I chose it because it really offsets the Mica/Metallic paper line well. For the peacock, I used some extremely detailed dies. They are designed to work together, and they produced this beautiful peacock image. I used the cardstock from the Mica/Metallic package. I used the following colors: Aquamarine, Gold, Amethyst, and Lapis Lazuli. This set of dies is one of the Scrapbooking Made Simple kaleidoscope dies, and I cut it using my Big Shot and the Precision Base Plate.
Jack-o-Lantern November 11, 2017
Posted by Danielle in Crafts.Tags: Distress Oxide Ink, Epic Black, Kraft, Memento, Mica/Metallic, Paper Temptress, Sizzix
3 comments
Here’s a quick and easy jack-o-lantern card to make, which can also be made as a pumpkin for Fall/Thanksgiving cards.
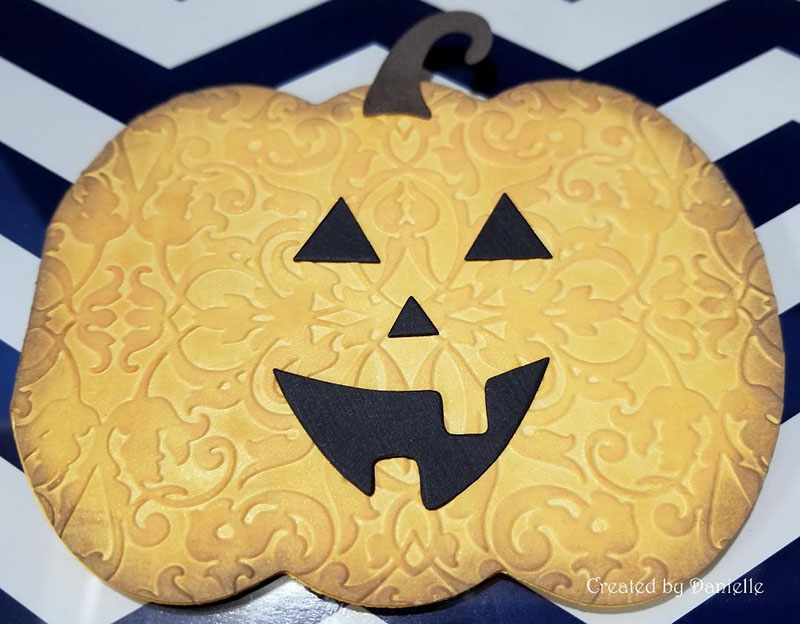
For this card, I started out using Amber Mica Metallic cardstock. I used the Pumpkin Fold-It die set to create the card. Included in the set are various shapes for the face and layering pieces for the pumpkin. The stem is cut out of Kraft/Brown bag cardstock, and the face is my favorite Epic Black cardstock. I inked the pumpkin with Memento Tangelo ink and then with Walnut Stain Distress Oxide ink. The card front is embossed using an embossing folder, which gives it a little extra dimension. Hope you are enjoying your weekend!
Easy Birthday Card October 14, 2017
Posted by Danielle in Uncategorized.3 comments
Here’s a quick birthday card that could be used or adjusted for either gender.
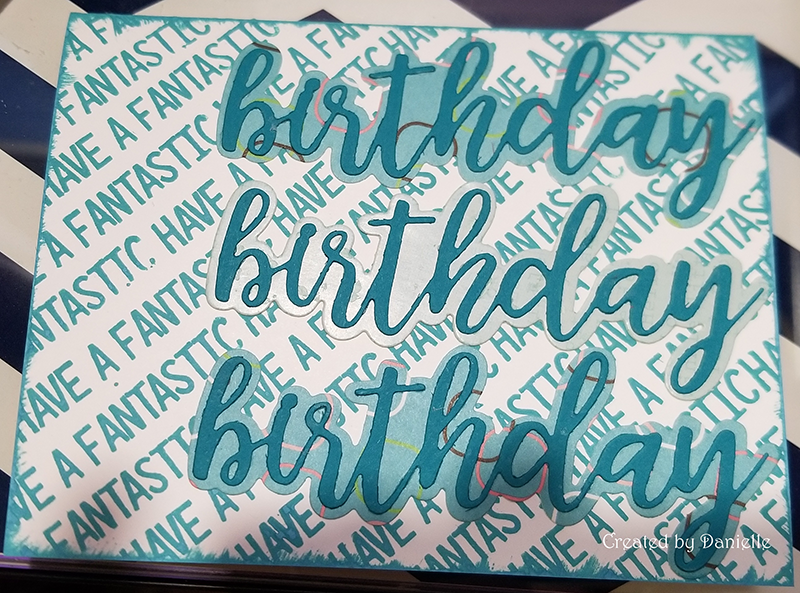
For this card, I used Neenah Solar White 110# cardstock as the base. Then, I used Peacock Feathers Distress Oxide to stamp “Have a fantastic” on an angle across the card base, and I used some scraps of teal cardstock to die cut the word “birthday” and the shadow from The Stamps of Life Birthday Statement Set. Obviously, the stamping and die cutting can be changed to any colors to suit any personality style.
Foiled Rose September 2, 2017
Posted by Danielle in Crafts.Tags: Anna Griffin, Epic Black, Go Press and Foil, Neenah, Paper Temptress, Vellum
3 comments
For those who celebrate it, I hope you are enjoying a wonderful Labor Day weekend with friends and family. It’s been a while since I’ve posted, but I hope you enjoy this card.

For this card, I foiled some Eclipse Black cardstock using an Anna Griffin hot foil plate and the Go Press and Foil machine. I am in love with the result! The rose is layered on a piece of the ever-delicious Heavy Weight Clear Vellum which cuts like a dream! Don’t be afraid to try it because it’s super thick. The two die cut layers are on top of a piece of paper from my stash, attached to a card base of Neenah Solar White 110# cardstock.
Chocolatey Deliciousness May 13, 2017
Posted by Danielle in Crafts.Tags: Kraft, Neenah, Paper Temptress, Stephanie Barnard, The Stamps of Life
2 comments
I hope everyone is enjoying their weekend! Today, I’m sharing an adorable cupcake card.

For this card, I used a new die set. It is a Sizzix die designed by Stephanie Barnard called the Cupcake Fold-it die set, and I think it is just the cutest! This is the second card I’ve made with it since I got the set about a week ago. It is perfect for birthdays, congratulatory notes, or just to brighten someone’s day. For the card base, I used Neenah Solar White cardstock. I used it for the card front as well. The way this die is designed, you can create either a top-folding or a side-folding card with it. However, you will be missing a small portion of the die cut because of the fold in the card, so you do need to cut an additional card front unless the missing piece doesn’t bother you. The cupcake liner is cut from some scraps of blue and grey paper, but that delicious chocolate-y frosting is cut from the equally delicious brown bag kraft paper.
Just for Ewe April 1, 2017
Posted by Danielle in Crafts.Tags: Flip It, Neenah, Paper Temptress, Sizzix, Stephanie Barnard, The Stamps of Life
3 comments
Hello, I hope you are enjoying your Saturday!
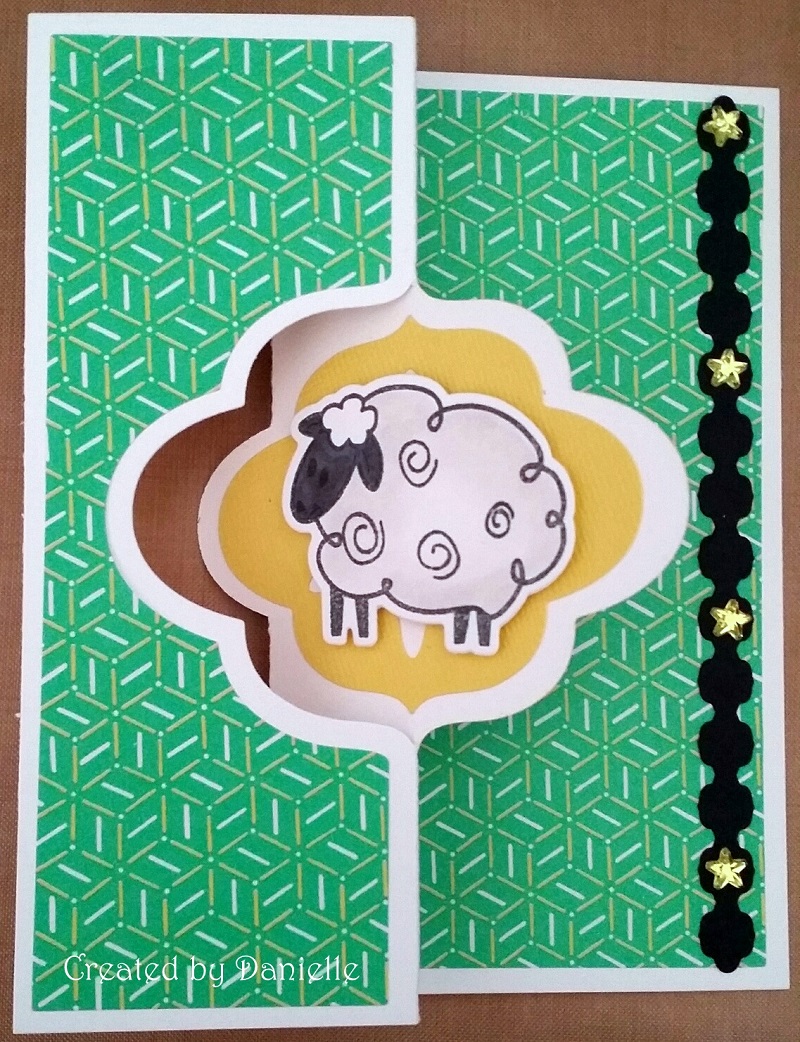
For today’s card, I’m sharing one of my favorite styles of card – a Flip-It! I think they are just a lot of fun, and I know my nieces and nephew enjoy receiving them because they have moving parts. I couldn’t resist the sheep image… March goes in like a lion and out like a lamb, right?? It sure did for us this year!
For the card base, I used Neenah Solar White 110# cardstock. It is nice and heavy, and the score lines create nice, clean creases. I also used Neenah Solar White 110# cardstock for the sheep, which is stamped with Tuxedo Black ink, die cut, and colored with Copics. For an accent, the strip along the side of the card is cut from Epic Black cardstock. The green paper on the sides of the card is some origami paper from my stash, and the yellow textured cardstock is from my stash as well.
The stamps and dies I used are new for me. They are by Stephanie Barnard, one of Sizzix’s designers, called Sheep2Stamp and the matching Sheep2Stamp die set. Inside the card, I also used the Elegant Labels framelit dies to cut out solid shapes for the other side and stamped “Just for Ewe.” The flip-it card die set is the Elegant Flip-it Card Set and I used it in conjunction with the Elegant Labels framelits.